

Last Updated: October 28, 2026
Quick Summary
To layer lipstick for a custom shade at home, apply a sheer base shade first, then add a deeper or brighter shade in the center of your lips. Blot between thin coats, and mix shades on the back of your hand to test the color in natural light before applying it.
- Put a sheer base shade on first, since it softens a bold color on top.
- Layer a tiny amount of a corrective shade to cancel unwanted undertones, such as blue-based red to neutralize orange.
- Apply thin coats and blot between them, because each thin layer sets before the next goes on.
- Let matte lipstick set for about 60 seconds before adding gloss, then blot first.
Table of Contents
- What Layering Lipstick Actually Does to Your Color
- Tools and Supplies You Need to Start Layering
- How to Mix Two Lipstick Shades on the Back of Your Hand
- Step-by-Step Lipstick Layering Without Caking
- How to Make Lipstick Lighter or Darker Without Changing the Formula
- How to Layer Lipstick and Lip Gloss for Shine and Depth
- Building Your Custom Shade Stash With Charmstyle Lip Products
- Frequently Asked Questions
Layering lipstick is the simplest way to get a custom shade without buying a new tube. Pick two or three shades you already own, put them on in the right order, and you can get a color that fits your skin, mood and outfit. This guide explains how to layer lipstick for custom shades at home, step by step.
What Layering Lipstick Actually Does to Your Color
Layering lipstick means stacking one shade over another, or blending two shades together, to create a new color. The result depends on the colors you start with, how much of each you use, and, the part most guides skip, the undertone of each formula. Understanding undertone is what separates a muddy mix from a custom shade that looks intentional.
Here is the basic idea:
- A sheer base shade softens a bold color and makes it look wearable.
- A deeper shade on top adds intensity and depth.
- A gloss over the top adds shine and can lighten or change the color slightly.
Think of it like mixing paint. Warm tones lean orange or gold. Cool tones lean pink, blue or purple. Mixing a warm and a cool shade often gives you something in the middle, like a rose brown or a muted berry.
The undertone correction most guides miss
Every lipstick has a surface color and an undertone. A red can be blue-based (cool) or orange-based (warm), and that undertone is what makes a shade pull too pink, too orange, or too brown on your lips. Instead of hunting for a new tube, you can layer a small amount of a corrective shade to neutralize the unwanted cast:
- A warm red pulling too orange? Layer a tiny amount of a blue-based red or a cool berry over it. Blue neutralizes orange, cooling the final color without turning it purple.
- A cool pink pulling too blue or gray? Add a dot of a warm coral or peach shade. The warmth cancels the blue cast and brings the color back toward neutral.
- A shade pulling too brown or muddy? A sheer bright pink or clear gloss on top lifts the tone without changing the base formula.
A common pattern is to correct in thin layers rather than one big adjustment: apply the base shade, then add the corrective color a dot at a time until the cast disappears. Because you are working with small amounts, the correction stays subtle and the original shade still reads as itself.
Why order matters more than ratio
The same two shades can produce different results depending on which goes on first. A sheer shade applied first acts as a diffuser, softening whatever goes on top. A bold shade applied first and topped with a sheer shade gives a stained, blurred effect. If you want the deeper color to dominate, put it down first and use the lighter shade only at the edges.
Once you understand undertone, the rest of layering becomes predictable: you are not guessing at combinations, you are adjusting one variable at a time until the color matches what you pictured.
Tools and Supplies You Need to Start Layering
You do not need a full studio setup. A few simple items make the process cleaner and easier.
- A clean mixing surface: The back of your hand works well, or a small palette.
- A cotton swab or disposable spatula: Use it to scoop and mix small amounts of color.
- A lip liner: A matching or neutral liner helps keep edges sharp.
- Tissue or a makeup wipe: For cleaning up mistakes.
Charmstyle Beauty Cosmetics offers lip beauty products. Our red lipstick is a good anchor shade for a stash because it pairs with many other colors.

How to Mix Two Lipstick Shades on the Back of Your Hand
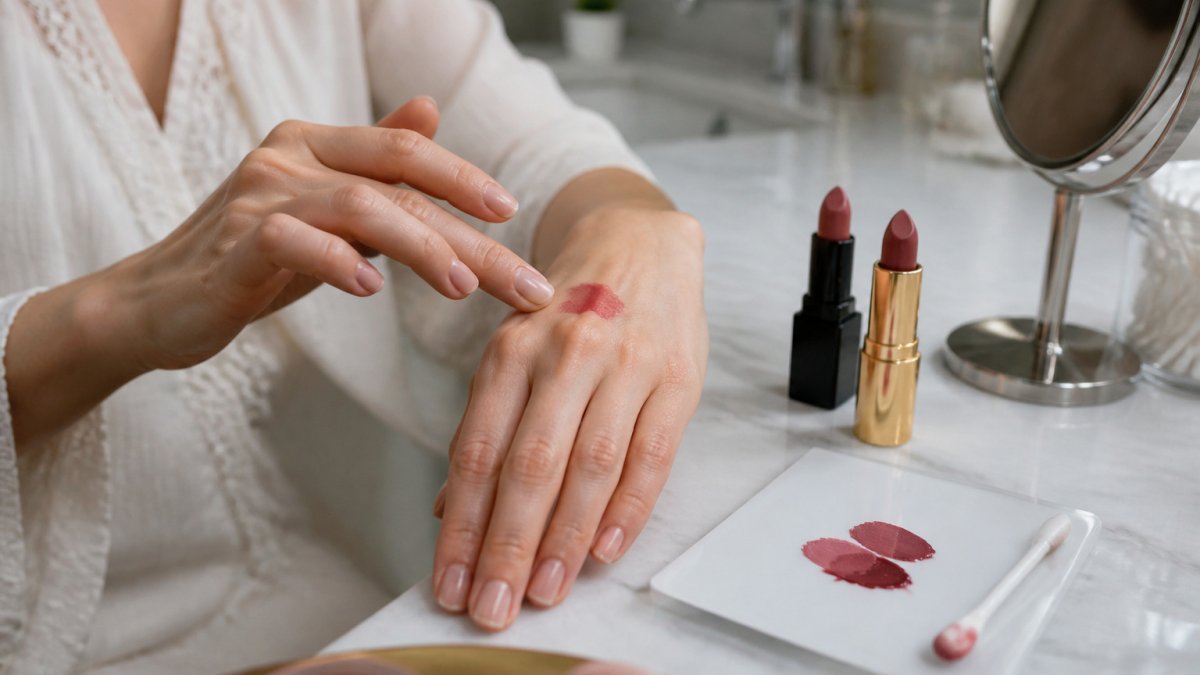
Mixing on your hand lets you test the color before it touches your lips. Here is how to do it:
- Wash your hands and dry them well.
- Swipe a small amount of the first shade on the back of your hand.
- Add a tiny dot of the second shade next to it.
- Use a clean swab to blend the two together.
- Check the color in natural light.
Start with a small amount of the bolder shade. You can always add more, but you cannot take it away.
Tip: Keep notes on your favorite mixes, including the ratio you used. You will soon have a personal color library.
For more help choosing the right base, read 5 Steps to Find Your Perfect Red Lipstick Shade. It explains how to match a base shade to your skin tone.
Step-by-Step Lipstick Layering Without Caking
Caking happens when product builds up in fine lines or dries out on the lips. You can avoid it with a few small changes.
- Exfoliate and moisturize. Gently remove dry skin, then apply a thin layer of lip balm. Wait a minute for it to soak in.
- Apply the base shade first. Use a light hand. Blot with a tissue.
- Add the second layer. Apply the deeper or brighter shade only to the center of your lips.
- Blend the edges. Use a clean finger or a soft brush to soften the transition.
- Blot again. This removes extra product and helps the layers set.
- Finish with gloss, if you like. Keep the gloss to the center for a lit-from-within look.
Layering light, thin coats works better than one thick coat. Each thin layer sets before the next one goes on, which keeps the color smooth.
Watch out: Do not layer over dry or flaky lips. Product clings to dry patches and looks patchy within minutes.
CHARMSTYLE BEAUTY NUDE LIPSTICK →
How to Make Lipstick Lighter or Darker Without Changing the Formula
You can change the depth of a shade without buying a new one.
To make it lighter:
- Blend in a sheer or nude shade.
- Blot the color after applying it.
- Dab a tiny amount of balm over the top.
To make it darker:
- Add a deeper shade from the same family, such as a berry over a pink.
- Line the edges with a darker liner before filling in.
- Apply a second thin coat after the first one sets.
Small changes go a long way. Try adjusting one step at a time, so you know what changed the color.
How to Layer Lipstick and Lip Gloss for Shine and Depth
Gloss adds shine, but it can also shift your color and, depending on the formula, break down the lipstick underneath. The finish you get depends less on the gloss color and more on how the two textures interact. Matching textures is the difference between a glossy layer that lasts and one that pills or slides off within the hour.
Texture compatibility: what layers well over what
Not every formula plays nicely with every other formula. A few general rules cover most combinations:
- Matte liquid lipstick + gloss: Works well once the matte has fully set. Matte formulas are designed to dry down and grip, so a gloss on top adds shine without dissolving the color, as long as you wait for the matte to set completely (about 60 seconds) and blot first. Gloss over a matte that is still tacky will lift the color.
- Cream lipstick + gloss: The most forgiving pairing. Cream formulas stay slightly mobile, so gloss blends in easily. The trade-off is wear time, cream plus gloss is the first combination to transfer onto a cup.
- Balm or sheer lipstick + gloss: Layers cleanly but offers the least longevity. Best for a soft, stained look rather than all-day wear.
- Matte liquid lipstick + cream lipstick: This is where pilling happens. Cream over a fully set matte can ball up because the matte surface repels the cream's emollients. If you want both, apply the cream first and the matte only in the center, or skip the combination.
A common pattern is to keep the heaviest, most emollient product on top and the grippiest product at the base. That ordering, stain or matte first, cream in the middle, gloss last, is the most stable stack.
Step-by-step for a glossy layered look
- Apply your lipstick first and let it set for 30 seconds. For matte formulas, wait a full minute.
- Blot once with a tissue to remove excess emollient, this is the step that prevents the gloss from sliding.
- Add gloss to the center of your lips only, pressing it in with the applicator rather than swiping.
- Press your lips together gently, then check the finish in natural light.
- If you need more shine later, reapply gloss to the center rather than the full lip, this keeps the color from migrating.
If the gloss feels heavy, use less. Heavy gloss can slide off and blur your color. For a lighter feel, pick glosses labeled lightweight or non-sticky; these tend to contain less oil and hold their position better over lipstick.
Longevity: setting a layered look
Layering usually lasts about as long as the top layer, so the finish you choose determines wear time. To get more hours out of a glossy layered look:
- Blot between every coat, including before the gloss.
- Keep gloss to the center of the lip, where it is less likely to migrate to the edges.
- Carry a blotting tissue rather than more product, blotting restores the matte base and lets you reapply gloss thinly.
- Avoid pressing your lips together repeatedly after the gloss goes on; each press moves product toward the lip line.
For a lighter feel, pick glosses that are labeled lightweight. The goal is a stack where each layer supports the one above it, so the shine stays put and the color underneath stays true.
The table below sums up which lipstick and gloss textures layer well together, so you can pick a stable order before you start.
| Combination | Result | Key tip |
|---|---|---|
| Matte liquid lipstick + gloss | Works well | Wait about 60 seconds and blot first |
| Cream lipstick + gloss | Most forgiving | Blends easily, but wears off faster |
| Balm or sheer lipstick + gloss | Clean layers | Least longevity, soft stained look |
| Matte liquid lipstick + cream lipstick | Pilling risk | Apply cream first, matte only in center |
| Gloss + lipstick on top | Weaker order | Lipstick slides; use lip stain instead |
Building Your Custom Shade Stash With Charmstyle Lip Products
A custom shade stash is a small set of colors you can mix in many ways. Start with three basics:
- A neutral nude: This works as a base for softening bold shades.
- A true red or berry: This gives you a versatile color for layering.
- A clear or sheer gloss: This adds shine to any combination.
Our CHARMSTYLEBEAUTY RED LIPSTICK offers bold, creamy color. A nude lipstick from our range is $10.00.

Once you have your basics, mix and match them for a few weeks. You will quickly learn which combinations you reach for most.
Frequently Asked Questions
How do you layer lipstick to create a custom shade?
Start with a lighter base shade, then add a deeper or more saturated shade over it. Adjust the color until it matches what you want.
Can you mix two lipstick shades together?
Yes. You can combine two shades to create a custom color. Adjust the amounts until you reach the color you want.
What is the best way to layer lipstick without it looking cakey?
Apply color in thin layers and blot between layers. Adjust the application until you reach the finish you want.
How do you make a lipstick shade lighter or darker?
To adjust a shade, combine it with another color and change the amounts until you reach the color you want.
