

Last Updated: November 6, 2026
Quick Summary
A lip kit routine is the fixed order you prep, line, color, and finish your lips so every product sits smoothly and lasts. Exfoliate two to three times a week, apply balm and blot the excess, then line, apply lipstick in thin layers, and add gloss last.
- Use a moisturizing lip scrub two to three times a week, not daily.
- Let balm sit a few minutes, then blot off excess before applying color.
- Beginners can start with three products: a scrub, a balm, and one lipstick.
- Match liner to lipstick by undertone first, then adjust depth.
- Blot between thin layers and once more at the end to set color.
Table of Contents
- Why Your Lip Kit Routine Fails Before Color Even Goes On
- The Lip Care Routine Step by Step: Prep First, Color Second
- How to Create a Perfect Lip Kit Routine Step by Step
- How to Create a Perfect Lip Kit Routine for Beginners
- How to Create a Perfect Lip Kit Routine for Dry Lips
- Matching Liner to Lipstick and Building a Kit That Works Together
- Making Color Last Through Lunch, Coffee, and a Full Workday
- Build Your Routine Around Charmstyle Lip Favorites
- Frequently Asked Questions
Why Your Lip Kit Routine Fails Before Color Even Goes On
Most lip color problems start before the tube is even opened. Patchy lipstick, fading color, and that tight, flaky feeling by noon usually trace back to skipping prep. The color often gets blamed when the real issue is the canvas underneath it.
A lip kit routine is the fixed order you prep, line, color, and finish your lips so every product sits smoothly and lasts. Get the sequence right and even a simple two-product kit looks polished. Get it wrong and the best lipstick in your drawer will still look uneven by lunch.
Here is what most guides skip: prep is not optional. It is the step that decides how everything else performs.
The Lip Care Routine Step by Step: Prep First, Color Second
Prep is the part of the lip care routine step by step that people rush. Slow it down and the rest gets easier. The goal is simple: remove flaky skin, then add moisture back before any color touches your lips.
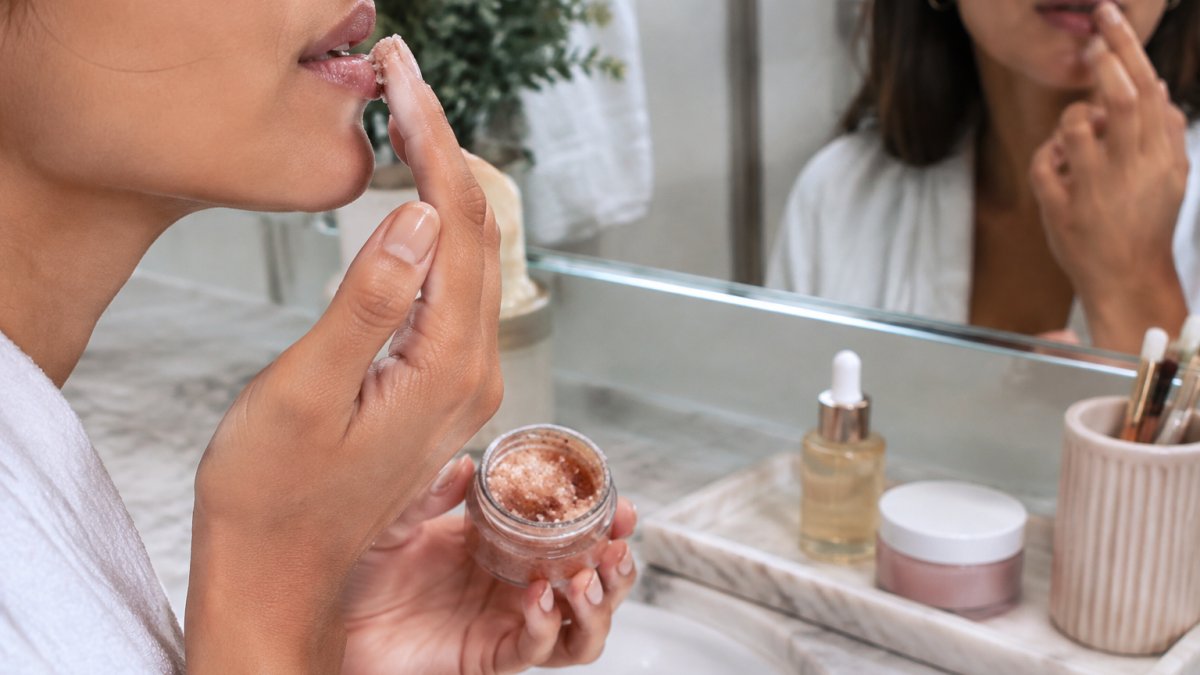
Exfoliate Gently (2 to 3 Times a Week, Not Daily)
The Kiwi Lip Scrub's listed use is two to three times a week for softer lips.
A soft, moisturizing scrub does the job without the grit. The Kiwi Lip Scrub is a moisturizing lip scrub: apply a small amount to lips, gently massage in circular motions, then rinse or wipe away the excess. If your lips are cracked or raw, skip exfoliation that day and go straight to balm.

Hydrate and Let Balm Sit Before Makeup
Apply balm, then wait a few minutes before applying lipstick. Wipe off any excess so the color has something to grip.
The Charmstyle Beauty Lip Balm is a lipstick-style product; swipe it on, let it settle, then blot.

How to Create a Perfect Lip Kit Routine Step by Step
Here is how to create a perfect lip kit routine step by step, in the order that actually works:
- Exfoliate if it is a scrub day, then wipe clean.
- Apply balm and let it sit for a few minutes.
- Blot off the excess.
- Line the lips to shape and hold color.
- Apply lipstick in thin layers.
- Add gloss or oil only where you want shine.
- Blot once more to set.
The Application Order: Liner, Lipstick, Gloss
Liner first, then lipstick, then gloss. That order matters. Liner creates a border that keeps color from bleeding, lipstick builds the base shade, and gloss goes last so it does not drag the color underneath.
For a soft everyday look, skip the gloss and stop at lipstick. For evening, add a dot of gloss at the center of the lower lip only.
How to Create a Perfect Lip Kit Routine for Beginners
Beginners need fewer products, not more. Start with three: a scrub, a balm, and one lipstick that suits your skin tone. That is a complete lip kit routine you can actually keep up with.
Keep these beginner rules in mind:
- One lip liner close to your natural lip color covers most shades.
- Thin layers beat one heavy swipe every time.
- Blot between layers for longer wear.
If you are still figuring out dry-lip fixes, our guide on how to fix dry lips before lipstick application walks through it in more depth.
How to Create a Perfect Lip Kit Routine for Dry Lips
Dry lips need moisture before, during, and after color. Build the routine around hydration, then choose formulas that feel comfortable rather than tight. The Rusty Nude Lipstick has a creamy, ultra-pigmented formula with hydrating, comfortable wear.
For a dry-lip kit:
- A moisturizing scrub used twice a week
- A balm you can reapply through the day
- A creamy lipstick instead of a matte liquid
- A gloss or oil for touch-ups
Matching Liner to Lipstick and Building a Kit That Works Together
A kit works when the pieces match each other, not just your skin. Most people buy lip products one at a time and end up with a drawer of shades that fight each other. Building a kit on purpose fixes that.
Match Liner to Lipstick by Undertone, Not Just Depth
Start with undertone. Hold the liner and lipstick side by side against your inner wrist in daylight. If one pulls orange and the other pulls pink, they will separate on the lips even when the depth looks the same. Match the undertone first, then adjust depth.
Then pick your depth rule:
- One shade deeper than the lipstick gives definition and a soft border.
- An exact match gives a seamless, no-line look.
- A lighter liner almost always reads chalky against a deeper lipstick, so avoid it unless you are deliberately creating contrast.
For overlining, stay within about one millimeter of your natural lip line and use a liner that matches your lip color rather than the lipstick. Going further out with a deeper shade is the most common reason overlining looks obvious.
Choose Formulas That Layer Together
Formula compatibility matters as much as shade. A matte liquid lipstick over a slippery balm will slide; a creamy lipstick under a heavy gloss will feather. A practical rule: keep the base and the topper in the same finish family. Creamy lipstick pairs with gloss or oil; matte liquid pairs with a thin liner and little else.
CHARMSTYLE BEAUTY KIWI LIPSCRUB →
Watch out: layering a waxy balm under a long-wear matte is the fastest way to get patchy fading, because the matte never bonds to the lip.
Separate Essential From Optional
A complete kit has four essentials and three optionals.
Essentials:
- A gentle scrub for prep.
- A balm for moisture and barrier.
- One liner that matches your natural lip tone.
- One lipstick in a shade you will actually wear daily.
Optionals:
- A bolder lipstick for evening.
- A gloss or oil for shine and touch-ups.
- A second liner one shade deeper for definition.
Beginners can stop at the four essentials and still run the full routine. The optionals are what let you change the look without changing the steps.
Build for a Budget
You do not need a large kit to get a polished result. A workable low-cost kit is a scrub, a balm, one nude liner, and one everyday lipstick; add a gloss when you want shine. A mid-range kit adds a bolder lipstick and a second liner. A full kit adds a lip mask for overnight care and a dedicated touch-up gloss. The sequence stays the same at every level; only the number of pieces changes.
If you are assembling a full set, our step-by-step guide on building a professional lip makeup kit shows how to choose pieces that complement each other.
Making Color Last Through Lunch, Coffee, and a Full Workday
Longer wear comes from layering and from fixing the specific failure you are seeing, not from one heavy coat. Apply lipstick, blot with a tissue, then apply a second thin layer. That sets the color and helps it survive a meal. After that, troubleshoot by symptom.
Feathering and Bleeding
Feathering usually means the liner is too soft or the lip is too moist at the border. Line just outside the natural lip line, then blot the liner before lipstick. If it still bleeds, switch to a firmer liner and skip gloss at the edges; keep shine at the center of the lower lip only.
Transfer Onto Cups and Masks
Transfer is a formula and layering issue. Blot between thin layers, then blot once more after the final layer. A light dusting of translucent powder through a tissue over the lip sets cream formulas without changing the shade. Long-wear matte liquids transfer less but dry more, so do not use this trick on already-dry lips.
Fading and Patchiness
Fading in the center is normal; patchy fading is not. Patchiness usually comes from color sitting on top of balm instead of on the lip. Blot the balm fully before color, and reapply in thin layers rather than one thick one. If a matte has already gone patchy, remove it with balm and start over rather than layering more on top.
Dryness During the Day
Dryness mid-day is a barrier problem, not a color problem. Keep a balm for between-coat moments, but blot it before reapplying lipstick so the new layer can grip. On very dry days, switch to a creamy lipstick and accept a shorter wear time rather than fighting a matte that will crack.
Touch-Up Order That Prevents Caking
The order matters more than the product. Blot oil and food first, then apply a thin layer of lipstick, then add gloss only if you want shine. Reapplying gloss over old lipstick without blotting is what makes touch-ups look thick and uneven.
Watch out: reapplying lipstick over a gloss layer without blotting first is the most common cause of a cakey midday lip.
| Goal | Best Product Type | How Often |
|---|---|---|
| Smooth base | Lip scrub | 2-3 times a week |
| Daily moisture | Lip balm | As needed |
| Everyday color | Creamy lipstick | Daily |
| Evening shine | Gloss or oil | On top of color |
For the full method, our guide on how to make lip color last longer covers seven expert steps.
Build Your Routine Around Charmstyle Lip Favorites
The routine only works if the products feel good enough to use daily. That is where we come in. Charmstyle Beauty Cosmetics offers lightweight, wearable lip products designed for everyday confidence.
Start with the Kiwi Lip Scrub for prep, the Lip Balm for color and everyday wear, and the Rusty Nude Lipstick for color. Three steps, one kit, a routine you will actually keep.
Frequently Asked Questions
What order should you apply lip liner, lipstick, and gloss?
Start with liner to shape and define the edges, then fill in with lipstick, and finish with gloss only in the center if you want shine. Gloss on top of liner everywhere can make the color slide, so keep it to the middle of the lip. If you want a softer look, blot the lipstick once before adding gloss. This order keeps edges crisp while the center stays comfortable and light.
How do you create a lip routine for dry lips without irritation?
Exfoliate only two to three times a week with a gentle scrub, like the Charmstyle Beauty Kiwi Lip Scrub ($8.00), Follow with a balm before color.
What lip products should beginners keep in a lip kit?
A beginner kit needs four things: a gentle scrub, a balm, one lip liner close to your natural lip color, and one lipstick you will actually wear daily. Add a gloss later once you know what finish you like. The Charmstyle Beauty Nude Lipstick ($10.00) is a nude lipstick option. Keep the kit small so you can see what you reach for and what sits unused.
How can you make lip color last longer without drying out your lips?
Prep is most of it. Exfoliate, moisturize, and blot excess balm before applying color so the lipstick grips rather than slides. Line the entire lip, not just the edge, then apply lipstick in thin layers and blot between them. Carry a balm for touch-ups instead of layering more color, and avoid pressing lips together right after application.
Building a lip kit routine is less about owning more and more about using the right order. Prep, line, color, set. Get that sequence down and your lips look polished with less effort. Charmstyle Beauty Cosmetics offers lightweight, wearable formulas designed to elevate your natural glow with ease. Get started with Charmstyle Beauty Cosmetics and build a lip kit routine that fits your day.
